Leave Your Message

7 Tips for Choosing Aluminium Ceiling Extrusion

Choosing Aluminium Ceiling Extrusion is not just a matter of selecting a profile that looks clean in a sample. The right choice affects ceiling alignment, installation time, durability, and how easily panels can be removed for maintenance. A narrow office corridor, for example, may need a different profile and finish from a humid kitchen or a large retail space. Small details matter.

This guide explores seven practical points: alloy and temper, profile dimensions, surface finish, load requirements, installation method, environmental conditions, and supplier quality. It also considers tolerances, compatibility with adjacent materials, and the documentation buyers should request. A polished sample can be misleading. Check the full specification.

For transparency, the following is an original illustrative line from a fictional specialist, not a sourced quotation: “A ceiling profile succeeds when its fit, finish, and fixing method work together on site.” The idea is simple, but real projects can be less tidy. A drawing may not capture uneven substrates or rushed installation. That is worth admitting. Use the tips ahead to compare options carefully, ask suppliers precise questions, and avoid choosing solely by appearance or price.
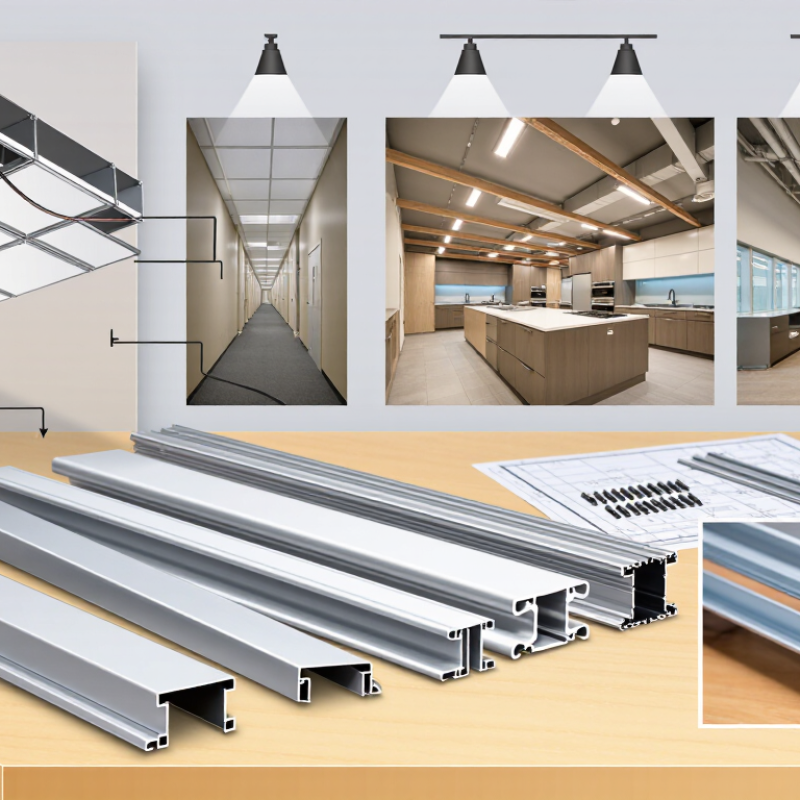
7 Tips for Choosing Aluminium Ceiling Extrusion

Define the Ceiling’s Performance and Design Requirements

Before comparing aluminium ceiling extrusions, define what the ceiling must do in its actual room. A quiet meeting room may need sound absorption, while a corridor may prioritize impact resistance and easy cleaning. Record lighting, ventilation, access-panel, and service-clearance needs before choosing a profile. Small details matter.

Measure the ceiling span and note where the supporting structure sits; these dimensions affect profile depth and fixing intervals. For long runs, ask a qualified professional to check deflection against the project specification instead of guessing from appearance. In bathrooms or coastal interiors, confirm that the alloy and coating suit moisture and cleaning chemicals. A polished sample can look convincing, yet still reveal scratches under angled light.

Consider how the ceiling will perform over time. Panels may need to lift out for wiring, valves, or routine inspection, so check that the extrusion allows access without bending adjacent sections. Review fire, acoustic, and indoor-air requirements in the project documents, and match product claims to tested data. It is tempting to specify the most rigid profile everywhere, but that may add cost without solving the room’s real problem. Some requirements may remain unclear; flag them rather than assuming the finish choice settles everything.
Select an Alloy and Temper for Strength and Formability

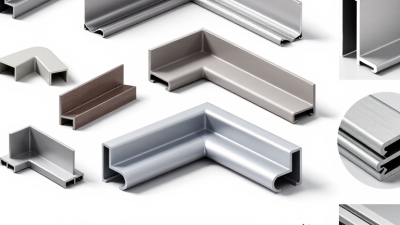
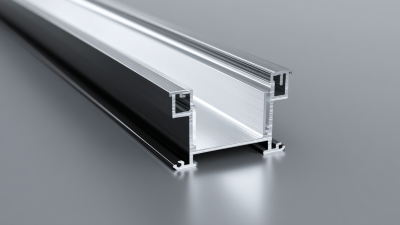
The alloy behind an aluminium ceiling extrusion affects how well it carries loads and holds a clean profile. For many interior ceiling systems, 6063 is a practical starting point because it extrudes well and can produce smooth edges. Where brackets or longer spans need greater strength, 6061 may be considered, though it can be less forgiving during forming. The right choice depends on the profile, support spacing, and installation conditions. A slim channel over a short bay is not the same as a deep section spanning a wide room.

Temper matters too. T5 and T6 are common heat-treated tempers, but their properties vary with alloy and manufacturing route. A harder temper can improve strength, yet may make tight bends or secondary shaping more difficult. Check the supplier’s certified mechanical data rather than relying on a temper label alone. Then compare it with the actual design loads and fixing details. Small details count. A sharp internal corner, for example, may concentrate stress or complicate extrusion. If the section needs additional forming after extrusion, discuss that process early; changing temper later is not always simple. I would not choose the strongest option by default. Sometimes a less demanding alloy-temper combination makes production more consistent, though that trade-off deserves testing on a sample profile.

Match Extrusion Profiles to Layout and Installation Needs

A ceiling plan is only useful when the extrusion profile suits the room and the installation sequence. Check grid spacing, ceiling height, service access, and perimeter details before selecting a shape. A deep carrier may help conceal wiring, while a slim profile can keep a low corridor feeling open. Allow for movement and uneven walls; even careful drawings can miss a troublesome corner.

Tip 1: For long corridors, compare profile lengths and joint positions to reduce visible breaks.

Tip 2: In rooms with lights or air grilles, confirm that the profile leaves workable access around each opening.

Tip 3: For exposed edges, choose a matching perimeter trim and check how installers will cut and fix it.

I would not assume one profile suits every room. A one-bay mock-up can reveal awkward cuts before the full ceiling goes up.

Material choices matter, too. The Aluminum Association’s recycling guidance reports that recycling aluminum uses about 95% less energy than producing primary aluminum. That figure does not determine the right profile, but it supports asking suppliers for documented recycled-content information. Check finish consistency across batches, especially where daylight makes small color differences obvious. A profile that looks clean on paper may still be difficult to install.

Compare Surface Finishes for Appearance and Durability

For aluminium ceiling extrusion, compare the finish under the lighting it will actually face. Anodizing preserves the metal’s visible grain and creates a hard oxide layer; brushed or satin surfaces also soften glare. Powder coating offers broader colour choices and a more uniform look, but scratches can expose the metal beneath. Small details matter. Ask for a sample and inspect it beside your ceiling lights, not only in a showroom. In practice, matching colours across batches can be harder than a specification sheet suggests.

Check performance criteria, not just appearance. The American Architectural Manufacturers Association’s AAMA 2604 and 2605 specifications require five and ten years of South Florida outdoor exposure testing, respectively, for qualifying coatings. These are qualification benchmarks, not promises of service life in every climate. For anodizing, AAMA 611 distinguishes architectural coating classes, including minimum thicknesses of about 10 and 18 micrometres. In humid rooms or coastal buildings, confirm the specified class, cleaning method, and warranty conditions. A glossy finish may show fingerprints more readily. Matte hides some marks, but can be harder to clean. The best choice depends on maintenance routines as much as colour.

7 Tips for Choosing Aluminium Ceiling Extrusion – Compare Surface Finishes for Appearance and Durability
Tip What to Compare Anodized Powder Coated PVDF Coated Mill Finish
1 Match the appearance to the design Retains a metallic look; common options include clear, bronze, and black. Colour choices are generally more limited than with paint. Offers a wide choice of colours, gloss levels, and textures, including matte finishes. Available in a range of colours and gloss levels; often chosen where long-term exterior colour retention matters. Uncoated, natural aluminium appearance. Extrusion lines or surface variations may be visible.
2 Consider the exposure environment Provides a protective oxide layer. Confirm the anodizing specification is suitable for the intended indoor or outdoor environment. Performance depends on pretreatment, coating quality, and exposure. Specify a system suitable for the installation conditions. Designed for demanding exterior exposure; confirm the coating system and applicable performance requirements with the supplier. Has no applied finish. The natural oxide forms on aluminium, but mill finish may not be suitable where a uniform decorative or protective finish is required.
3 Check resistance to wear and scratches The anodic oxide is integrated with the aluminium surface and generally offers good abrasion resistance. It does not hide extrusion marks. Creates a separate coating layer. It can be scratched or chipped by impact, depending on the coating and conditions. Coating performance depends on the specified system. Surface damage can expose the aluminium beneath. No added coating to scratch, but the bare surface can be marked, abraded, or unevenly weathered.
4 Look for consistent corrosion protection The oxide layer improves corrosion resistance; results depend on the anodizing process, sealing, and service environment. Protection relies on correct surface preparation and an intact coating. Damage may require prompt attention in corrosive environments. Provides a coating barrier when correctly applied and maintained. Confirm suitability for the specific exposure, including coastal or industrial conditions. Offers no applied barrier coating. Suitability depends on the environment and the required appearance over time.
5 Ask about colour stability Colour stability varies with the anodizing process and any dyes used. Check the specified finish and sample for colour expectations. Colour and gloss retention vary by powder formulation and exposure. Request data for the intended application. Architectural PVDF systems are commonly selected for strong exterior colour and gloss retention; performance depends on the specified system. No applied colour. Its appearance can change with natural oxidation and exposure.
6 Plan cleaning and repair Usually requires routine cleaning with suitable non-abrasive methods. Repairs to damaged or mismatched areas can be difficult to blend. Clean with methods compatible with the coating. Touch-ups may not perfectly match the original colour, gloss, or texture. Follow the coating supplier’s cleaning guidance. A damaged area may need specialist repair to achieve a close match. Has no coating to peel, but dirt, handling marks, and natural surface changes may affect appearance.
7 Compare total cost and samples Compare the specified anodizing thickness, colour, and finish consistency; inspect production samples for variation. Compare pretreatment, coating specification, colour, and texture. Obtain a sample and check it under the project lighting. Confirm the coating specification, number of coats where relevant, colour, and warranty terms. Costs are system- and project-dependent. Often avoids the cost of an applied decorative finish, but may not meet appearance or exposure requirements. Review actual extrusion samples.

Verify Quality Standards, Supplier Support, and Total Cost

Choosing an aluminium ceiling extrusion is not just a matter of matching its profile to a drawing. Ask suppliers for alloy and temper details, dimensional tolerances, and documented quality checks. These records help you compare products on more than appearance. Request a sample and inspect its finish under the lighting used in the room. Small scratches can stand out once installed.

Tips: Confirm that the supplier can provide relevant test records and consistent batch specifications. Ask how they handle damaged lengths, delayed orders, and technical questions. Check lead times and minimum order quantities before approving a quote. Clear answers matter. A polished sample is useful, but it does not prove every batch will match.

Compare total cost, not just the price per length. Include cutting, finishing, packaging, freight, installation waste, and replacement risk. A lower quote may use different tolerances or exclude protective wrapping, which can affect handling on site. Ask for a written breakdown. Also verify that the extrusion fits the ceiling system, connectors, and planned fixing method. One easy mistake is assuming standard dimensions will suit every project; they may not. If the supplier’s support feels vague, pause and get the details in writing.